Deploying an Express API easily on AWS Lambda
Learn the least expensive way to host your Express API

AWS Lambda with Serverless Framework
AWS has always been the leading provider of serverless services. The most famous service they offer in their serverless lineup is by far AWS Lambda. Lambda provides an unique opportunity to simplify how we think about Micro-Services. However, let's get down to business and see how we can use it to get a fast, simple and inexpensive Express API deployed online.
Setting up
The first thing needed is an AWS account. If you do not have one yet, you will need to follow these instructions to get access to the services. AWS can give the impression of not being easy to use or learn at first. The good news is that we will use the Serverless Framework to simplify our setup and get everything deployed smoothly.
Once you are registered, let's jump in a console to install the Serverless Framework command-line tool.
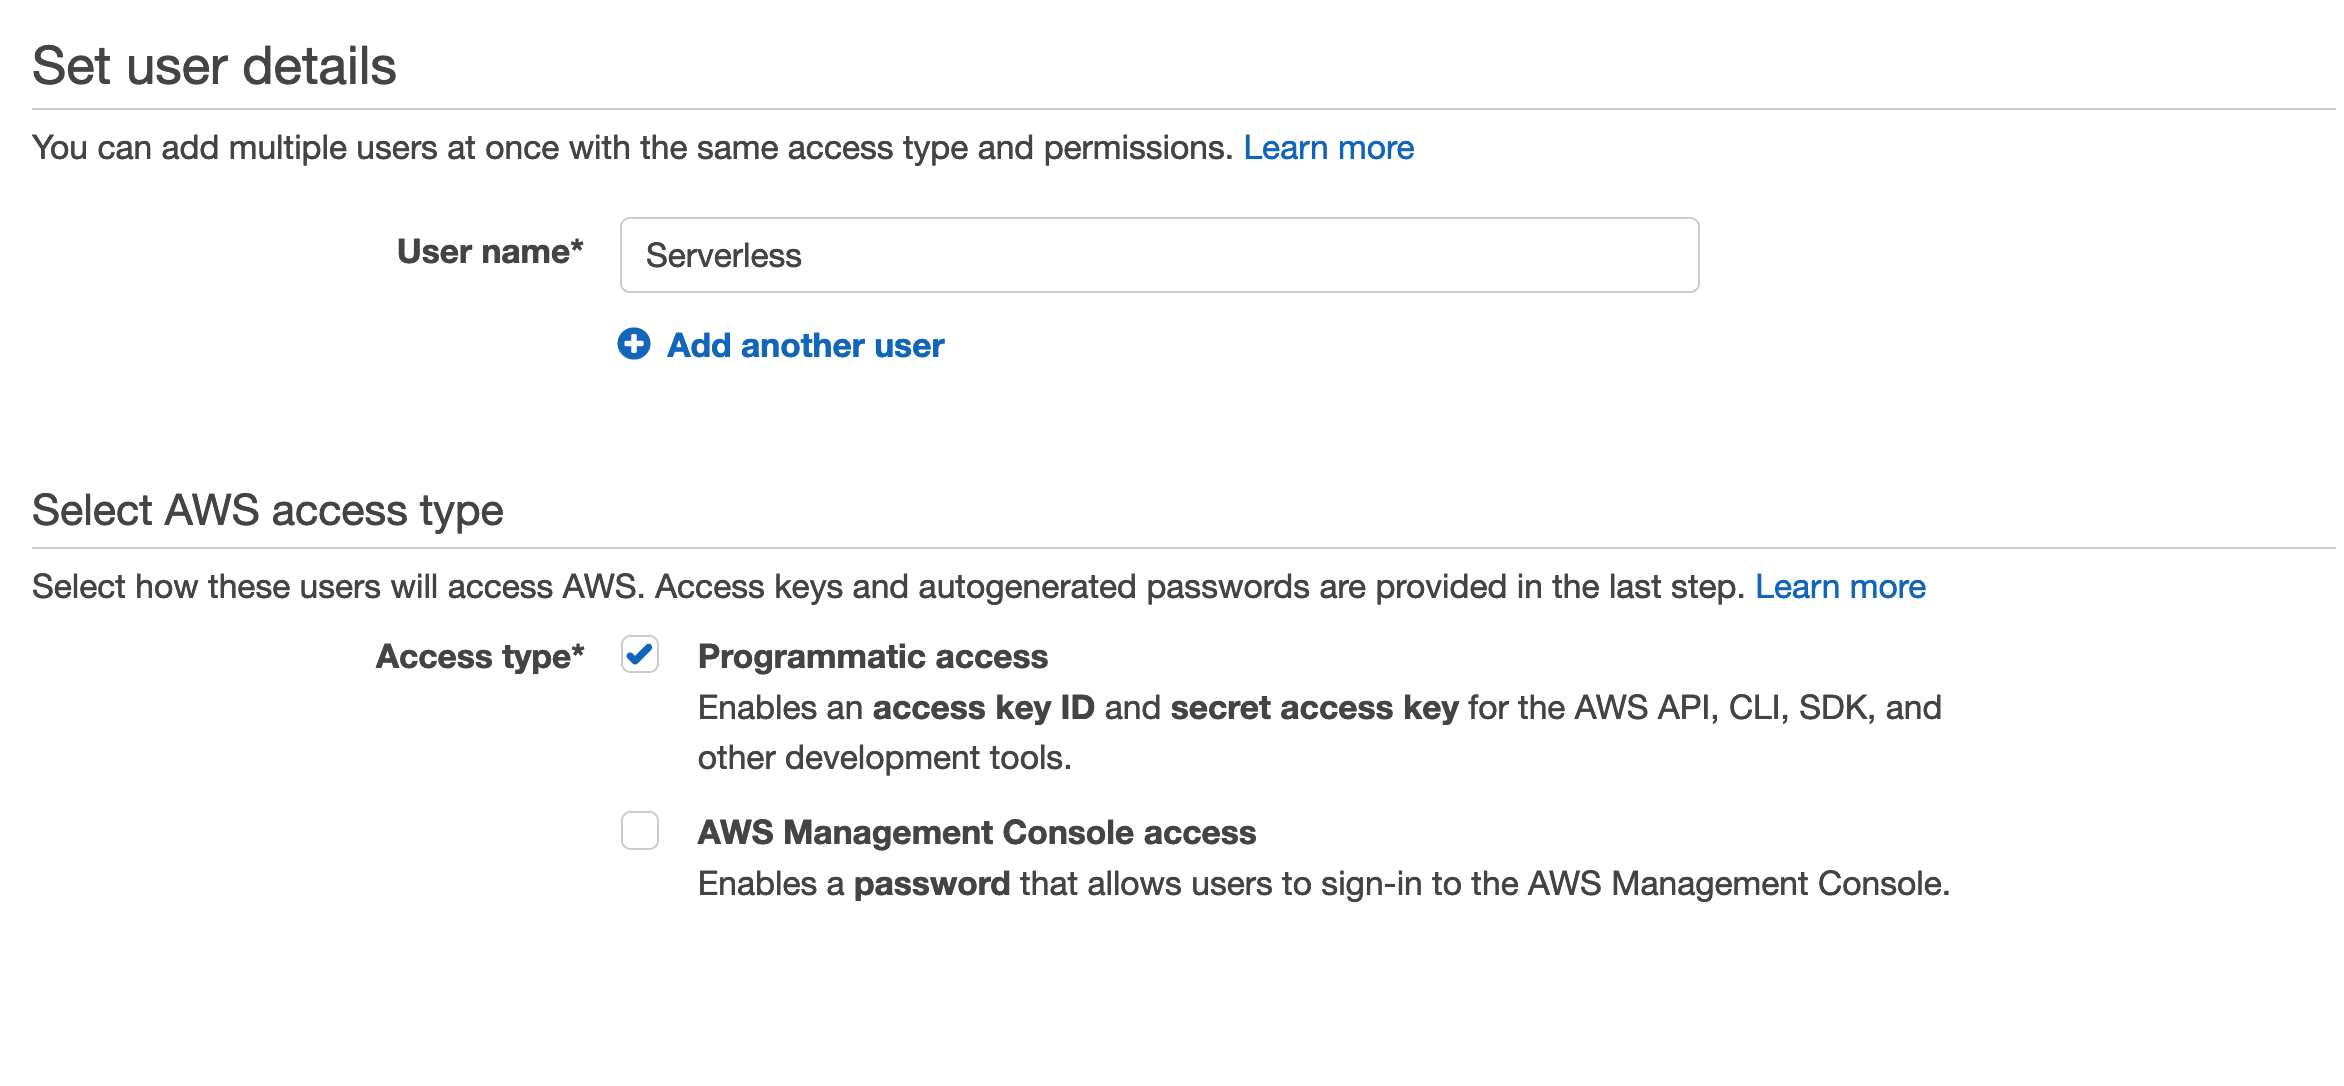
yarn global add serverlessOnce this is done, navigate to the AWS Identity and Access Management(IAM) console to create a new user. Once on the page, name the user Serverless and check "Programmatic access".

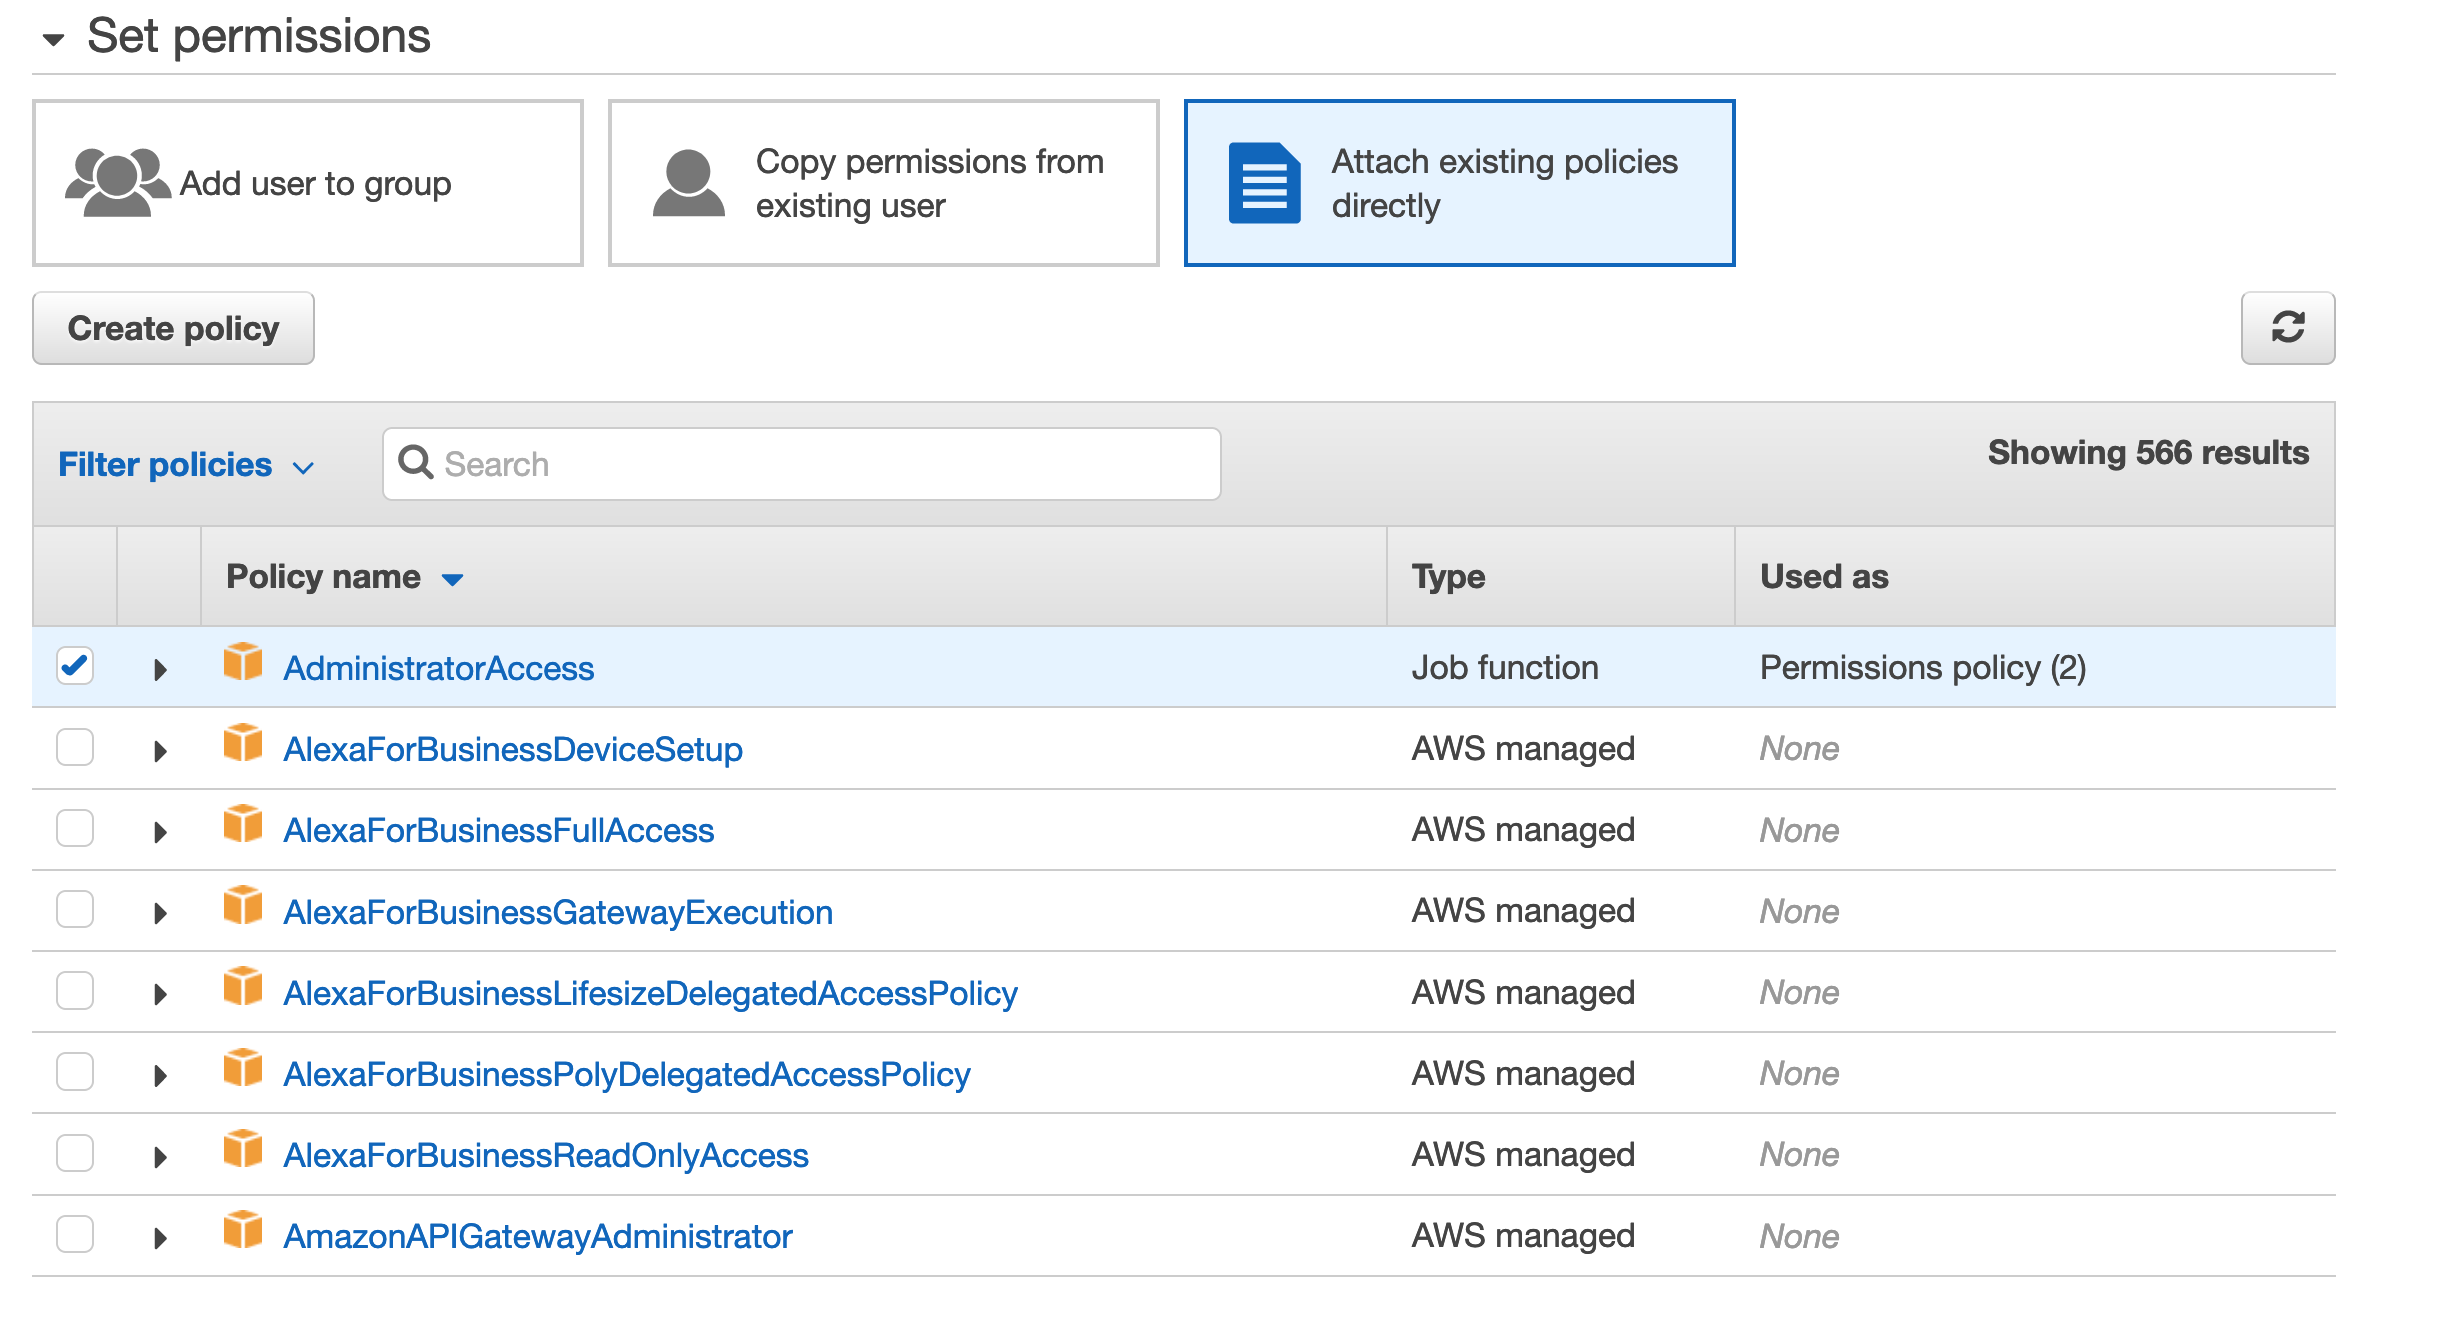
On the second page, select "Attach existing policies directly" and then check the "AdministratorAccess" Policy. The resulting key gives complete access to your AWS account. Keep it out of Github repositories and never share it directly with somebody.

Proceed to the other steps. You can optionally add tags. Continue accepting the default parameters until you get to the result screen. Take note of the Access Key Id and Secret Access Key values. We will need them in the next step. Reminder: never share those keys or add them directly in your code.
Now let's jump back into the terminal and let's configure the Serverless CLI. You will need to use here the two values that you noted down from AWS.
serverless config credentials --provider aws --key access-key-here --secret secret-key-herePreparing our repo
Now that we have properly set up our accounts and CLI, we can create our project files.
serverless init express-starter
cd express-starter
The Serverless CLI provides many different options to help you configure the different services you want to use, but in our case, we are using one of the most interesting tools that the CLI provides: Serverless Components. To be more specific, Serverless Components are small units of deployments that can be initialized super quickly and offer minimalistic configurations.
They are really well-suited to get you started on your project while still giving you the full power and configuration options you might need. Let's explore a bit the folder structure we just generated:
app.jstypical Express API codepackage.jsonincludes almost nothing except Express as a dependencyserverless.ymlconfiguration file used by Serverless to deploy your service
Since our package.json is a bit lacking in scripts, change it to be like this:
{
  "name": "src",
  "version": "1.0.0",
  "description": "",
  "main": "app.js",
  "dependencies": {
    "express": "^4.17.1"
  },
  "devDependencies": {},
  "scripts": {
    "dev": "serverless dev",
    "deploy": "serverless deploy  --stage prod"
  },
  "author": "",
  "license": "ISC"
}
We have added two new commands that in appearance are simple, but they pack a lot of power.
yarn devwill start watching your local files for any changes and will auto-deploy in real-time the new code to the AWS cloud. This has the amazing advantage of being deployed in the same setting as a production environment.yarn deploywill deploy your Express API to the production stage.
Now we can change the content of app.js to make our Hello World API:
"use strict";

const express = require("express");
const app = express();

// Routes
app.get("/*", (req, res) => res.json({ message: "Hello world" }));

// Error handler
app.use((err, req, res, next) => {
  console.error(err);
  res.status(500).send("Internal Serverless Error");
});

module.exports = app;
Once this is done, start the automated dev deployments with yarn dev and look for the URL that will be exposed in the console. It should look something like this: https://40m08fu8ia.execute-api.us-east-1.amazonaws.com, but the prefixed number will be randomly generated.
If you navigate to this URL, you should receive a JSON Hello World response. Code changes in app.js will automatically be deployed and logs will be streamed back to your terminal 🤓. Deploying the service to a different production URL is as simple as calling yarn deploy!
Conclusion
We have just started to explore the great features the Serverless framework offers. Here are some takeaways:
- AWS does not have to be complicated or scary.
- You can now host an Express API for around $0.000003 per request.
- Code can be found on GitHub.